
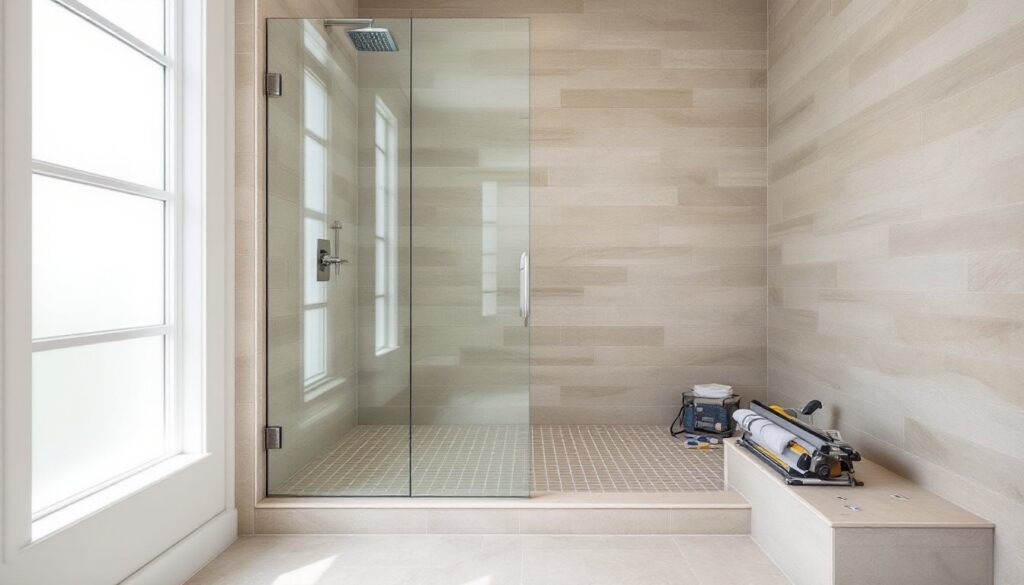
The 12×24 tile format has become a game-changer for modern shower design. Unlike smaller tiles, these rectangular planks create clean sightlines and require fewer grout joints, meaning less maintenance and a more cohesive look. Whether someone’s renovating a guest bath or tackling a full master suite overhaul, 12×24 tiles offer versatility across styles, from minimalist contemporary to textured farmhouse aesthetics. The size works beautifully in both vertical and horizontal orientations, and because fewer tiles cover the same area, installation goes faster (though precision matters). This guide walks through five proven layout approaches and installation fundamentals so homeowners can plan a shower that looks professional and holds up for years.
Key Takeaways
- 12×24 shower tile layout options create clean sightlines and fewer grout joints than smaller tiles, resulting in less maintenance and a more professional appearance.
- Proper substrate preparation with cement board, corrosion-resistant fasteners, and leveling compound is essential to prevent tiles from sagging or popping loose over time.
- Vertical stacking patterns and horizontal running bond layouts require precision; use leveling spacers, dry-laying, and a 4-foot level to ensure flat alignment before installation.
- Natural stone 12×24 tiles demand pre-sealing with penetrating sealant, annual re-sealing, and epoxy grout to resist staining and mildew in wet shower environments.
- Use polymer-modified thin-set mortar with tight grout joints (1/16 to 3/32 inch) and 100% silicone caulk at corners to accommodate movement and prevent water infiltration.
- Textured and specialty tiles add visual interest but trap soap scum; clean weekly with stiff-bristled brushes and verify slip-resistance ratings (minimum 0.60 COF) for shower floor safety.
Classic Subway Tile Layouts
Subway tile, a 3×6 profile, is iconic, but 12×24 tiles bring the same clean aesthetic with fewer joints and a modern edge. The classic running bond pattern (offset rows, like brick) remains the go-to for a reason: it’s forgiving, creates visual interest, and hides imperfections in layout.
Vertical Stacking Patterns
Vertical stacking (also called floor-to-ceiling alignment) works well in narrow showers where consistent grout lines draw the eye upward, making the space feel taller. This pattern is straightforward: each row aligns directly above the previous one, creating clean vertical columns of grout. The trade-off is visibility, mistakes in tile straightness show immediately. Before tiling, snap a plumb line and verify the substrate is flat using a 4-foot level. Any deviation greater than 1/8 inch over 10 feet needs shimming or leveling compound.
For vertical layouts, start from a corner and work outward, dry-laying tiles first. Mark the grout joint width, typically 1/16 inch for large-format tiles, on the substrate with a pencil. This small detail prevents the tiles from creeping and ensures consistent spacing. Use leveling spacers or shims under each tile as installed: they’re worth the time investment. When grouting, use a polymer-modified grout rated for wet areas: this prevents cracking and water infiltration behind the tile.
Large-Format Minimalist Designs
12×24 tiles are already large-format, but arranging them in a clean, single-color palette amplifies the minimalist effect. Light grays, warm whites, or soft greiges recede visually, making even a small shower feel expansive. The fewer visible grout joints mean the eye travels uninterrupted across the wall.
Horizontal orientation (landscape) is typical for minimalist layouts. Stagger the tiles like running bond to break visual monotony while keeping the color palette unified. A single accent line, perhaps a darker 12×24 stripe halfway up the wall, or a thin contrasting trim, adds sophistication without clutter. Choose matte or satin finishes over high-gloss: they’re easier to keep clean and are safer underfoot if used on shower floors (glossy surfaces become slippery when wet).
Minimalist work demands precision. Use a quality tile saw with a wet blade: a cheap blade burns tile edges and creates micro-fractures. Ensure all cut edges face the back corner or are covered by trim. Pre-seal porous tiles before grouting, white or light grays absorb stains. Test sealant on a scrap first. White grout looks fresh but stains easily: consider an epoxy-based grout if budget allows, as it resists mildew and discoloration better than traditional cement grout.
Natural Stone and Marble Finishes
Natural stone, slate, travertine, marble, brings organic texture and tactile appeal. 12×24 slabs of honed marble or tumbled travertine feel luxurious and photograph beautifully. The downside: natural stone requires more care than porcelain. It’s porous, can stain from soap residue, and demands regular sealing.
Before installation, seal the stone in the shower pan and on walls using a penetrating sealer rated for wet areas. Most manufacturers recommend two coats, applied 24 hours apart, before grout touches the stone. Re-seal annually in shower environments. Use a pH-neutral cleaner designed for natural stone: acidic cleaners (vinegar, lemon) etch and dull the surface.
Grout choice matters with stone. Avoid standard gray grout, which can stain light marble. Use a grout colorant matched to the stone, or select epoxy grout for superior stain resistance. Apply grout sealer after the grout fully cures (typically 72 hours). Natural stone is heavy, a 12×24 marble tile can weigh 35–50 pounds. Ensure the substrate (cement board, not drywall) is properly fastened with 1.5-inch corrosion-resistant screws spaced 12 inches apart vertically and horizontally. This prevents tiles from sagging or popping loose over time.
Bold Colors and Geometric Patterns
Bold colors and geometric designs turn a shower into an art statement. Deep teals, charcoals, blacks, or even saturated jewel tones work with 12×24 format because the large tile size keeps busy patterns from feeling chaotic. Geometric options include chevron, herringbone (angled at 45 degrees), or mixed color striping.
Geometric layouts require patience and precision. Herringbone, for instance, demands numerous angled cuts and careful dry-laying beforehand. Sketch the layout on graph paper, accounting for how cut tiles will align at corners and trim edges. A miter saw with a ceramic blade handles angled cuts cleanly, though renting a wet saw from a tool library is cheaper if the project involves dozens of cuts.
Color coordination extends beyond tile selection. Pair deep wall tiles with a lighter floor or neutral grout to prevent the space from feeling cave-like. Consider how natural light (or bathroom ventilation) affects color perception: view samples under the actual bathroom lighting before committing. High-contrast grout, light grout on dark tile or vice versa, emphasizes geometry but shows dirt and mildew more readily. A mid-tone grout can bridge the gap visually while being more forgiving.
Textured and Specialty Tiles
Textured tiles, whether brushed, fluted, or hammered finishes, add depth and visual interest without requiring complex layout patterns. A single-color textured field, like a gray 12×24 with a subtle flute pattern, combines minimalist simplicity with tactile richness. Textured surfaces also provide better slip resistance in wet areas, important for shower floors.
Specialty tiles include hand-painted or artisan ceramic 12×24 formats, which introduce personality and craftmanship. These often cost more (two to four times standard porcelain) but become focal points. Use them sparingly, perhaps an accent wall behind the showerhead, and pair with neutral field tiles to avoid visual overwhelm.
Texture brings hidden challenges. Fluted or carved surfaces trap soap scum and mold spores more readily than smooth glazes. Select a stiff-bristled brush and use it weekly during cleaning: soft cloths won’t dislodge debris from textured grooves. Sealing textured tiles helps, though matte and naturalized finishes resist sealant adhesion. Test before full application. Install textured floor tiles only if their slip-resistance rating meets ASTM F1679 standards (a minimum of 0.60 COF, or coefficient of friction, for wet conditions).
Installation Tips for 12×24 Tiles
Installing 12×24 tiles requires a solid understanding of substrate prep, adhesive selection, and joint management. These large tiles are unforgiving: a slightly crooked grout line or poor mortar coverage becomes obvious.
Substrate preparation is non-negotiable. The shower wall should be framed with corrosion-resistant fasteners and covered with cement board (not greenboard, which absorbs moisture). Cement board should be fastened with 1.5-inch alkali-resistant screws every 12 inches in both directions. Ensure all joints between boards are staggered, and tape them with alkali-resistant mesh tape and thin-set mortar. Fill any voids or low spots with leveling compound before tiling begins.
Choose a polymer-modified thin-set mortar rated for wet areas. Mix it to a peanut butter consistency, thick enough to hold its shape but spreadable. Use a notched trowel sized for the tile: for 12×24 tiles, a 1/2-inch x 3/8-inch square-notch trowel is standard. Hold the trowel at a 45-degree angle and comb the mortar in one direction, ensuring complete coverage without voids. Apply thin-set to the back of each tile as well (back-buttering), especially near edges.
Spacing is critical. 12×24 tiles look best with tight grout joints, typically 1/16 inch to 3/32 inch. Wider joints (1/8 inch or more) look sloppy with large-format tiles. Use shims or leveling spacers to maintain consistent spacing and plane (flat alignment) as tiles are set. Check alignment every few tiles with a level and straightedge.
Allow thin-set to cure fully before grouting, typically 24–48 hours depending on humidity and temperature. Grout selection depends on aesthetic and maintenance preference. Urethane or epoxy grout costs more but resists staining and mildew better than traditional sanded cement grout. Once grout cures (usually 72 hours), apply a penetrating sealer if using cement-based grout, especially in high-moisture shower environments.
Finally, apply caulk, not grout, at corners and where tile meets the shower base or curb. Caulk accommodates slight movement and prevents water from wicking behind tiles. Use a 100% silicone caulk rated for wet areas: paintable silicone-latex blends don’t perform well long-term in showers.
<h2 id="” data-id=””>Conclusion
12×24 tiles offer modern aesthetics and practical benefits for any shower renovation. Whether choosing classic subway patterns, bold colors, or natural stone finishes, success hinges on solid substrate prep, precise layout, and quality materials. Take time with dry-layout and measurement, these steps catch mistakes before permanent installation. And don’t hesitate to call a licensed installer if structural concerns or complex geometry feel beyond comfort level. A well-tiled shower pays dividends in longevity and daily enjoyment.